Photography tips & tricks for the small creator

Ever wished you could improve your photography, but felt like you didn’t have the proper tools or equipment to do so? ..Well, you’re in luck!
I’m here to tell you it’s possible to turn photos from ‘this’ to ‘that’ with just your smartphone, a good window, and a bit of practice!
☆ ☆ ☆
I’d like to start by stating that I am in NO way a professional photographer. I can’t keep up with camera tech talk to save my life, nor did I attend photography classes or watch tutorials to get where I am. BUT, what I do have is practice… Over 18 years worth! I’ve worked with basic cameras such as Kodak Easyshare (they’re legit out of business now, to give you an idea of how rudimentary it was), all the way to a DSLR with more features than I ever knew what to do with.
Within that time I like to think I’ve learned a thing or two.. or at least enough to help other creators take beautiful photos and represent their art. With that said, let’s get started! ^-^
The Summary
A common misconception people have is that you need fancy equipment or special software to make your photos great, but that’s simply not true. I take all my photos (both the ones I use for prints and the ones for posting) with only my iPhone and a popsocket.. And I’m not even sure the popsocket is necessary, it just helps get weird angles!
I have a fancy camera, light ring, and all that, but honestly never use them. If I had to simplify things, I’d say the two main tips I always recommend to creators are:
1) take your photos in natural daylight
2) have a neutral colored background
…you can really produce some amazing photos by following just those two tips!
The Why
Daylight is perhaps the one thing I can’t stress enough. It is so import and can truly make or break a photo at times! For the best results, I actually recommend taking your photos in slightly overcast light, as it’s the best for achieving high quality results with minimal effort. Photos taken in really bright sunlight often have uneven lighting and create harsh shadows that are hard or impossible to correct, even with something like a photo editing app.
When taking photos of your work you want to prioritize creating a very neutral colored background in addition to focusing on your light source. Personally I really like the look of a white background, but plain white can often look a bit industrial (especially if the piece is more of a simplistic design), so I like to break it up by adding a complimentary element of color around the art. This allows my work to look clean, crisp, and professional, while still providing some additional elements of color that should help make the art the focal point of the image.
A few examples of complimentary elements I’ve used are: Real/fake plants, colored glitter, and tissue paper (..an amazingly cheap way to get a lot of variety!)
The How
Okay, let’s use my Korok for example. This was all taken with natural daylight. I actually waited a few days until the sunlight coming through my window seemed right. It’s worth the wait, especially if you’re going to make prints!
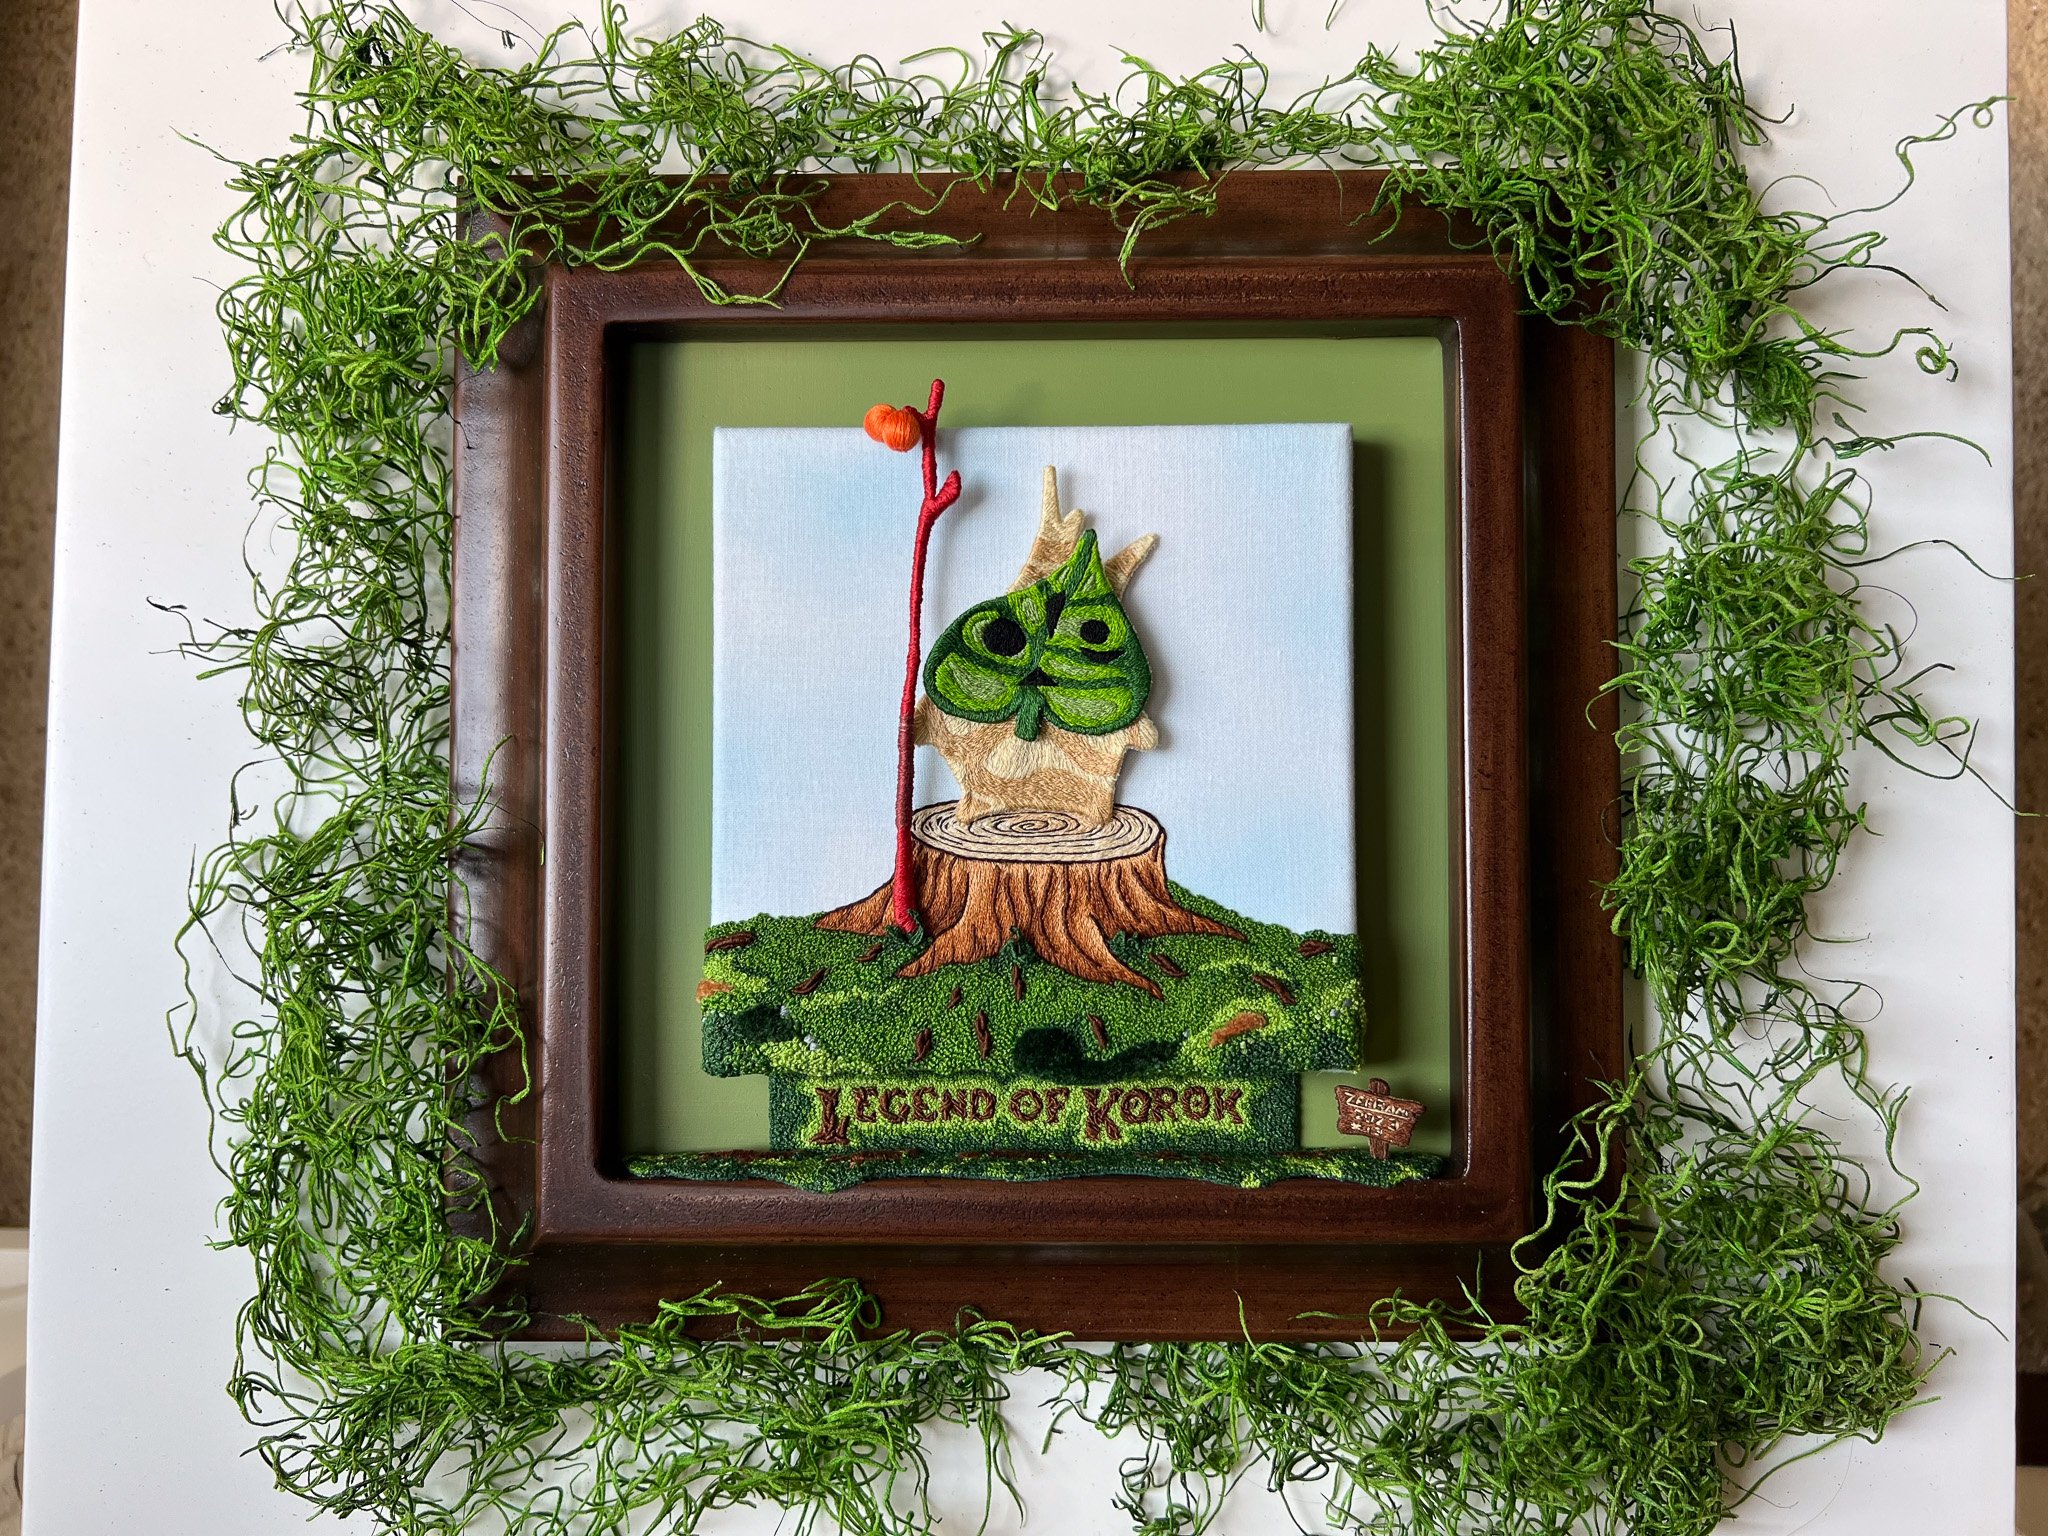
THE ORIGINAL
So at first glance, it’s not a bad photo, but you can tell it needs a bit work with the crop and brightening. When you’re taking a photo for prints, I suggest one of the main things you should focus on is the angle. To a lot of people they’d see the carpet on the edges and the more dull lighting as a sign of a bad photo, but what actually made this photo good was:
My words were legible, everything I wanted to be in the print was in the frame, and the angle itself was just good! You’re looking straight down at the embroidery piece, which means when you crop the image it’ll look like it’s flat or hanging on a wall. So when all that extra stuff on the sides is cropped off, you’d never know!

THE EDIT
When I edit my photos I focus on white balancing, brightness, and the crop. Sometimes I’ll add a little vibrancy or warmth to the colors, but not a ton because I usually want it to look close as close to the original as possible.
I personally have Lightroom which is a photography editing app, but I didn’t always have it and you definitely don’t NEED it. You can use your smartphone for 100% of the process and still get amazing edits if you use natural daylight as your light source. With that said, it does take some practice to get the white balancing right, but you do get better over time until eventually you don’t even have to think about it! Daylight is going to be your biggest asset when it comes to editing, as it will eliminate most of the struggles that people experience because it’s doing all the work that fancy apps and cameras would normally provide.
A good rule of thumb to follow: Check your photos after you take them. If they are coming out with a colored tint (such as yellow or blue), then you should keep trying until you’re able to capture something more neutral. Often it only takes a slight change in the angle or focus of your phone to get rid of colored tints. It can be hard to fully get rid of colored tints when editing (even with an app like Lightroom), so it’s worth the extra time to try again in the moment!
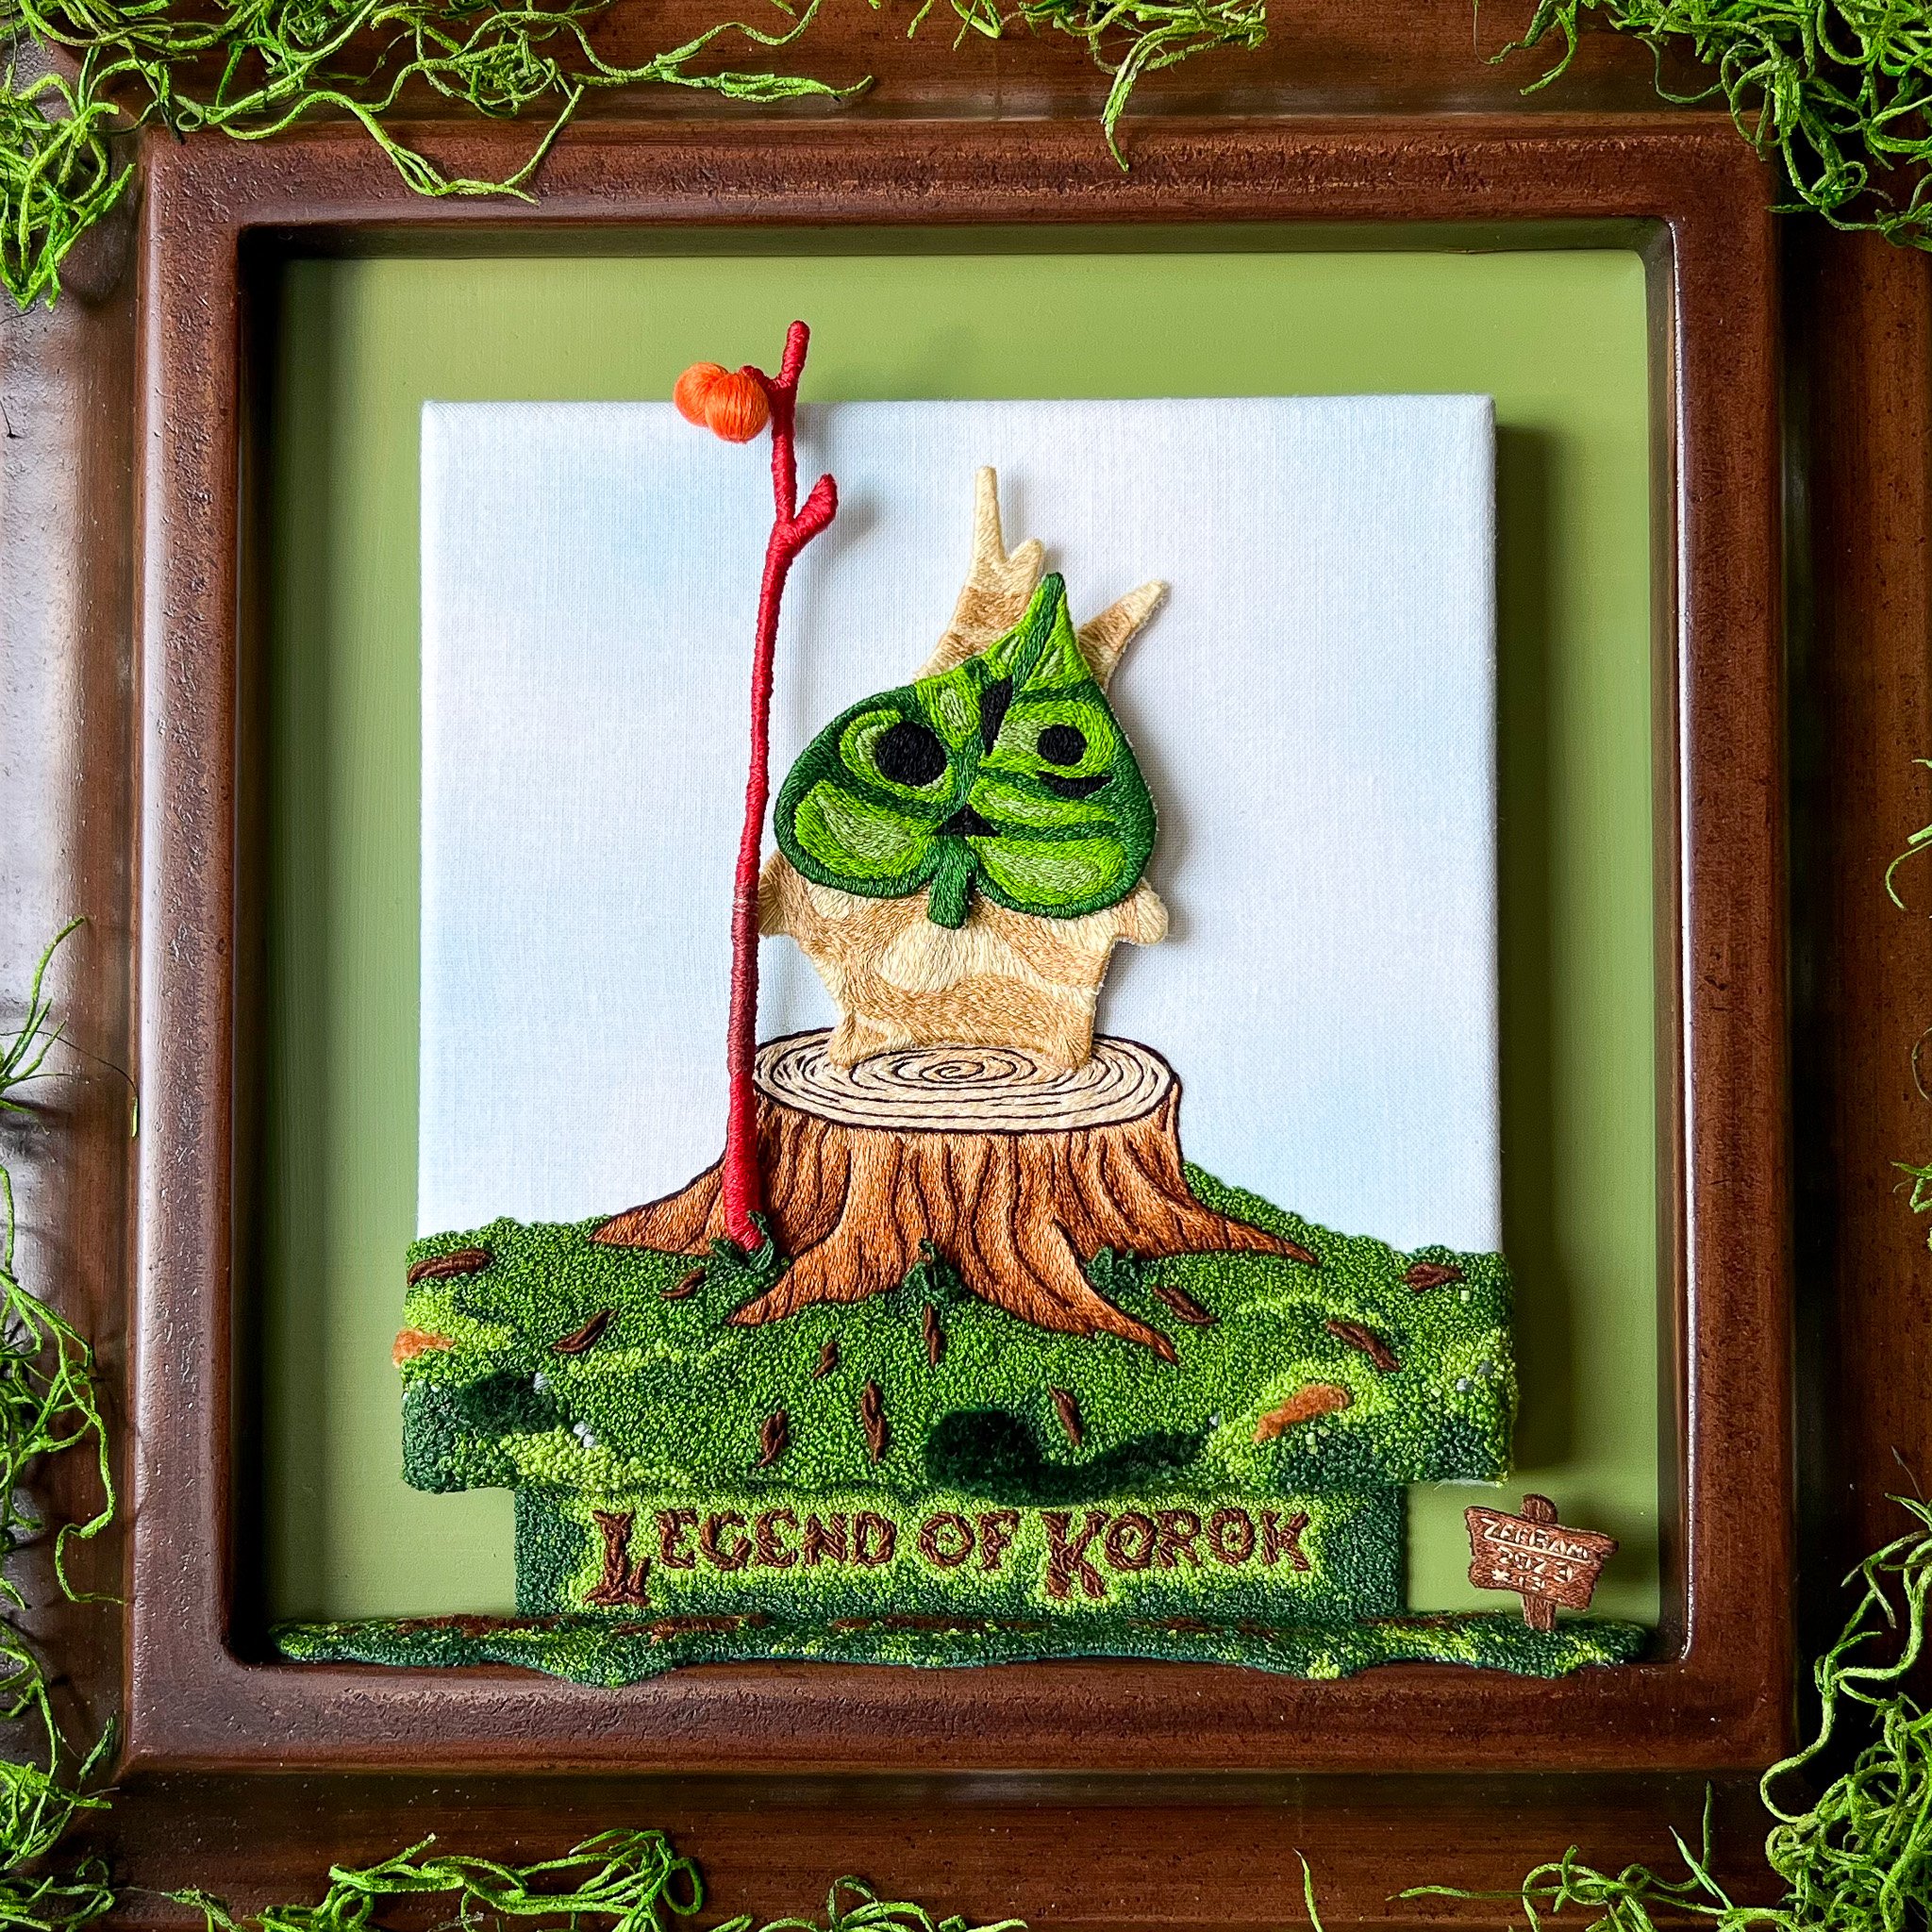
THE CROP
Once my photo was edited for social media, I focused on the crop for my prints. The crop really can bring a dull photo to life, but it’s also something that can be unique and in your style! For this print I knew I wanted the green moss around the edges of the frame and for the frame itself to be visible as well since I was planning on making 3D glass block prints of the design. The crop might not look like much in the image above, but you can see how truly three dimensional it came out in my my video here.
I focus on the edges when working with glass block prints because of the mirrored effect, but if I’d chosen to create flat prints I would’ve gone a completely different route and left more of the original image in frame. That’s the beauty of ‘the crop’ …It’s something that you can adjust and truly make your own!
The When
Perhaps one of the biggest hurdles I hear from other creators is, “I don’t have the time to take photos.” ..and I agree! There is never really enough time to get things done these days, but I promise this takes less time than you think. In my experience, finding time when the lighting is good is definitely one of the hardest parts. For reference, it generally takes me 30 minutes to 1 hour to get a batch of 5-10 photos, so you’ll want to keep that in mind and try to make note of what the weather will be like on the days you’re available. Of course, everyone’s schedule is different, so don’t stress if you can only dedicate a smaller amount of time. Fifteen minutes is better than nothing, and if you only have time for a couple of photos just go for it!
As for the Edits? Well, that’s the wonderful thing about using your smartphone… You can edit your photos literally anywhere! Lunch breaks, waiting in line, doctors offices, and even playgrounds (if you’ve got kids, which I know a lot of fellow creators do). These are all great options and the more comfortable you get with editing, the faster it will go.

With that said, at the end of the day you are going to be the biggest asset in what you create, because that’s what photography is, isn’t it? ..Just another form of creation! And the more you experiment and try new things, the more quickly you’re going to learn what works best for you. ^-^
☆ ☆ ☆
A Note from the Author:
First of all, thank you so much for being here! I hope you enjoyed the very first “Shoots & Stitches” blog post. I’ve really had the best time putting this together, and I can’t wait to start writing more topics to share with the community. If you found this information useful and you want to help support the blog, I’ve included a “Buy Me A Coffee” link below where you can donate. Of course, any and all shares to social media are another a great way to help provide support and are immensely appreciated.
To stay up to date with the latest blog posts you can Subscribe Here, and if you have questions or would like to recommend a future blog topic, please leave a comment below.
Was this topic helpful to you? ..I’d love to know!